

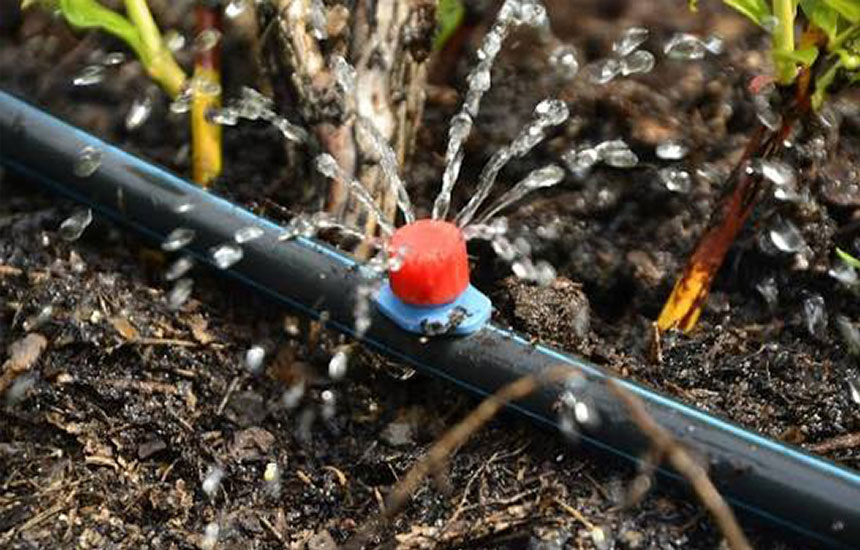
A drip irrigation system delivers water slowly and directly to the soil near plant roots. Instead of spraying a large area, it uses tubing and small outlets to provide controlled watering where plants need it.
For a small vegetable garden, raised bed, greenhouse, or group of containers, a simple drip system can reduce the time spent watering and help limit water waste caused by evaporation and runoff.
The key is to plan the layout around the plants, available water supply, and required flow rate. This guide explains how to build a practical system without making it unnecessarily complicated.
1. Understand the Main Components
A basic small-garden drip system may include the following parts.
Water source
The system may connect to an outdoor tap, a suitable rainwater tank, or another compatible water supply. The source must provide enough flow and pressure for the selected equipment.
Filter
Small emitter openings can become blocked by sediment and debris. A filter helps protect the system, especially when the water contains visible particles.
Pressure regulator
Some drip components require lower or more consistent pressure than a typical household water supply provides. A regulator helps keep pressure within the system’s specified operating range.
Main tubing
The main line carries water from the source to the garden area. It is commonly made from flexible irrigation tubing.
Distribution tubing
Smaller tubing branches from the main line and carries water toward individual plants or rows.
Emitters
Emitters release water at a controlled rate. Common options include fixed-flow emitters, adjustable emitters, and inline drip tubing with built-in outlets.
Connectors and end fittings
Tees, elbows, couplings, stakes, clamps, and end caps help shape and secure the layout.
A timer can automate watering, but it is optional. The system should be tested and adjusted before relying on automatic operation.
2. Plan the Garden Layout Before Buying Materials
Start by drawing a simple map of the garden.
Mark:
- The location of the water source.
- Each planting bed or container group.
- Plant rows and approximate spacing.
- Areas that need different watering schedules.
- The route the main tubing will follow.
Keep the layout as simple as possible. A small rectangular vegetable bed may only need one main line and a few branches.
Plants with very different water requirements should not automatically share the same watering schedule. For example, a group of drought-tolerant herbs may need less frequent watering than moisture-loving vegetables.
If the garden has multiple zones, consider separate valves or independently controlled lines.
3. Choose the Right Drip Irrigation Tubing
Tubing size and layout affect water distribution.
Mainline tubing is generally larger and carries water through the garden. Distribution tubing is smaller and connects the main line to plant locations.
When choosing tubing, check:
- Outside and inside diameter compatibility with fittings.
- Maximum operating pressure.
- UV resistance if exposed to sunlight.
- Flexibility and resistance to kinking.
- Whether the tubing is designed for outdoor irrigation.
Do not assume that tubing and connectors with similar dimensions are interchangeable. Check the manufacturer’s measurements and fitting compatibility.
4. Select Suitable Drip Emitters
Emitter selection depends on plant type, spacing, soil, and water requirements.
Individual point-source emitters
These are useful when plants are spaced apart, such as tomatoes, peppers, or larger container plants.
Inline drip tubing
This contains built-in outlets at regular intervals. It is convenient for evenly spaced rows or narrow planting beds.
Adjustable emitters
These allow the output to be changed within the product’s operating range. They can be useful for mixed planting arrangements, but require periodic checking.
How much water does each plant need?
There is no single correct emitter flow rate for every plant. Water demand changes with plant size, temperature, wind, soil type, sunlight, and growth stage.
Start with the emitter’s stated output and observe how deeply the soil becomes moist. Adjust watering duration and emitter placement based on actual soil conditions rather than using a fixed schedule for every garden.
5. Install the Drip Irrigation System Step by Step
Step 1: Prepare the water connection
Turn off the water before installing the components. Connect the appropriate adapter, filter, and pressure regulator if required by the system.
Make sure the connections are compatible with the water source and the tubing.
Step 2: Lay out the main tubing
Place the main line along the planned route. Avoid sharp bends, areas where people regularly walk, and locations where garden tools may damage the tubing.
Use suitable stakes or clips to keep it in position.
Step 3: Connect distribution lines
Use compatible connectors to branch from the main line toward planting rows or containers.
Cut tubing cleanly and push fittings fully into place according to their instructions.
Step 4: Install emitters
Position emitters close enough to the root zone to wet the soil effectively, but avoid placing them directly against plant stems.
For larger plants, more than one emitter may be appropriate. The number and flow rate should match the plant’s needs and the system’s capacity.
Step 5: Secure and close the lines
Use end caps or the specified flushing fittings. Make sure open tubing ends are closed before normal operation.
Step 6: Flush and test the system
Before finalizing the layout, flush the lines to remove debris. Then close the ends and turn on the water.
Check every connection and emitter for leaks, blockages, or uneven flow.
6. Adjust Watering for Different Garden Conditions
A drip system is not a set-and-forget solution. It needs adjustment as the garden changes.
Sandy soil: Water drains more quickly, so shorter and more frequent watering may be necessary.
Clay soil: Water moves more slowly through dense soil. Long watering periods may cause pooling or runoff, so use shorter cycles and observe the moisture pattern.
Raised beds: Their drainage and drying rates can differ from ground-level beds. Check soil moisture below the surface.
Containers: Potting mixes may dry quickly, but container size and plant type make a significant difference.
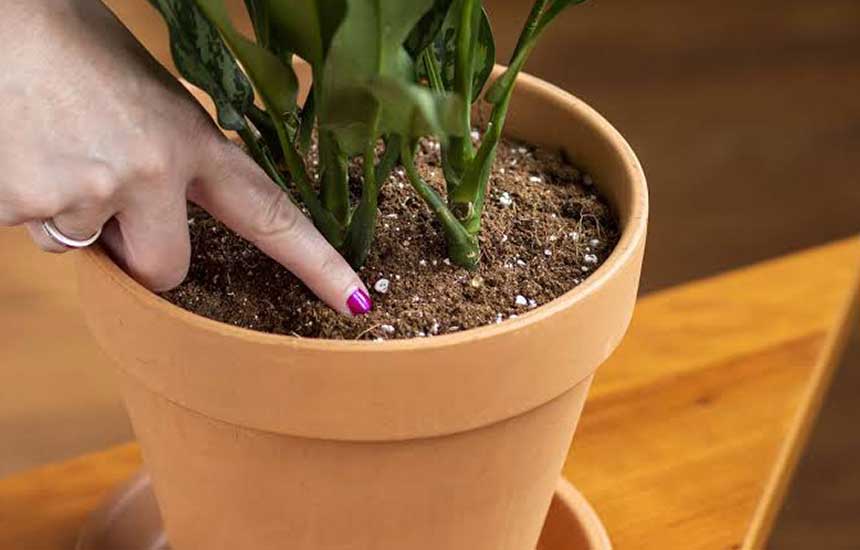
A simple test is to check the soil several centimeters below the surface after watering. The goal is to moisten the active root zone without keeping the soil continuously saturated.
7. Common Drip Irrigation Problems
Emitters are not releasing water
Possible causes include clogged outlets, insufficient pressure, a closed valve, or a kinked line.
Turn off the water, inspect the filter, flush the tubing, and clean or replace blocked components according to the instructions.
Some plants receive less water than others
Check for pressure differences, long tubing runs, blocked emitters, and unsuitable emitter spacing. A system may need to be divided into zones if the water source cannot support all outlets at once.
Water collects on the soil surface
The flow rate or watering duration may be too high for the soil’s absorption rate. Reduce the duration or use shorter watering cycles.
Tubing leaks or separates
Check whether the tubing and fittings are compatible and whether the connection has been installed correctly. Replace damaged sections rather than covering a leak with an improvised repair.
8. Maintain the System Throughout the Season
- Inspect the filter regularly.
- Flush lines when necessary.
- Check emitters for blockages.
- Look for damaged tubing and loose connections.
- Adjust the schedule during hot, cool, rainy, or dry periods.
- Keep tubing away from sharp tools and heavy foot traffic.
- Drain or protect the system where freezing conditions may occur.
At the beginning of each growing season, run the system and inspect every zone before planting or relying on automatic watering.
Frequently Asked Questions
Is drip irrigation suitable for a small vegetable garden?
Yes. It can work well for raised beds, vegetable rows, and container groups when the layout and emitter spacing match the plants.
Does a drip irrigation system need a water pump?
Not always. A suitable tap supply may provide enough pressure. Gravity-fed systems may also work with compatible low-pressure equipment, but the available pressure and flow must be checked.
How long should I run a drip irrigation system?
There is no universal duration. It depends on emitter flow, the number of outlets, soil type, weather, and plant requirements. Check soil moisture and adjust the schedule.
Can I use drip irrigation for potted plants?
Yes. Individual emitters or suitable micro-tubing can deliver water to containers. Make sure each pot receives enough water and has adequate drainage.
Should drip tubing be buried?
It depends on the system design. Surface installation makes inspection and maintenance easier. Some products are designed for subsurface use, but ordinary surface tubing should not be buried unless the manufacturer permits it.
Final Advice
A successful small-garden drip system starts with a simple layout, compatible components, and careful testing. You do not need a complicated network to water a few beds or containers effectively.
Begin with one zone, observe how water moves through the soil, and adjust the system as plants grow. Regular inspection is just as important as the initial installation.